
I’ve been using the Olympus OM-D E-M10 micro four thirds interchangeable lens camera for a few weeks now.
After getting over a steep learning curve, this is a really great camera. I still have a number of gripes about it that I’d like to see fixed in a future firmware update (where possible) or at least in a future camera model.
Using Wi-Fi to Transfer Images to Your Computer
This camera has a big “WiFi certified” logo on the box and a Wi-Fi button on the touch screen. So I assumed that you could transfer images to your computer using your local WLAN network.
Wrong.
The Wi-Fi can only be used to connect the camera to a smart phone, control it from there, and transfer images to the smart phone. All of this is done using the Olympus OI.share app. The in-camera Wi-Fi can’t be used to connect to a Wi-Fi access point (e. g. at your home). Instead, the camera itself basically becomes an access point which your phone connects to. There is no way to connect your computer to the camera using Wi-Fi.
To do what I thought was “standard” (transferring images to your local computer wirelessly), you need to buy an Eye-Fi card, which is basically an SD card with integrated Wi-Fi. Why this is necessary, I just don’t understand.
USB Charging and Charger
The Olympus OM-D E-M 10 can’t be charged using an USB cable, which is really sad because USB ports and (Micro-) USB chargers are everywhere nowadays.
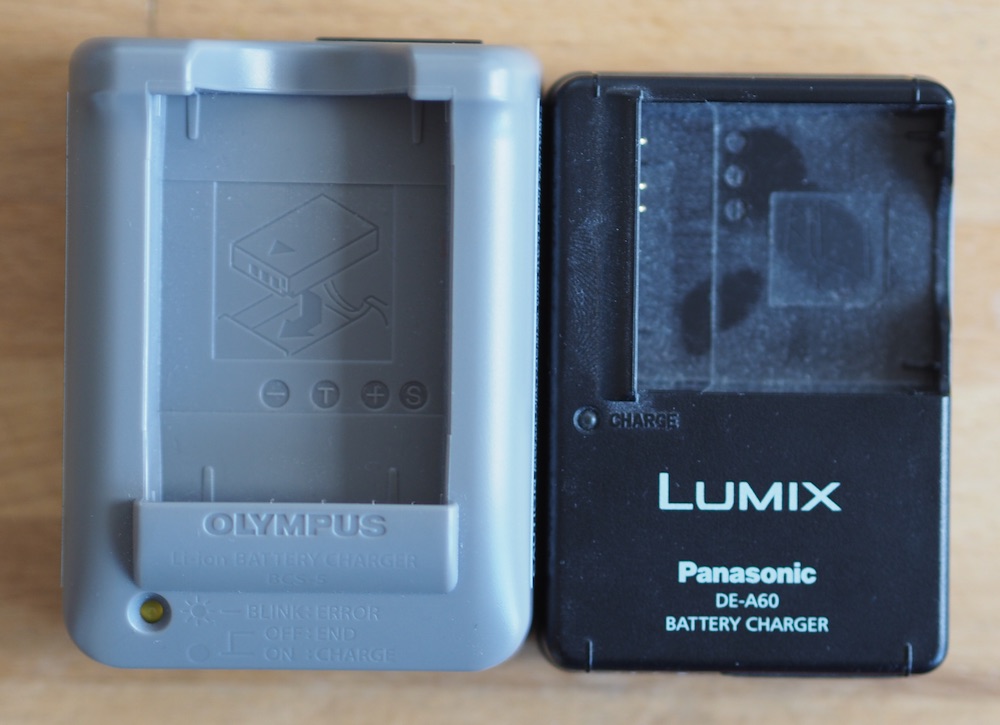
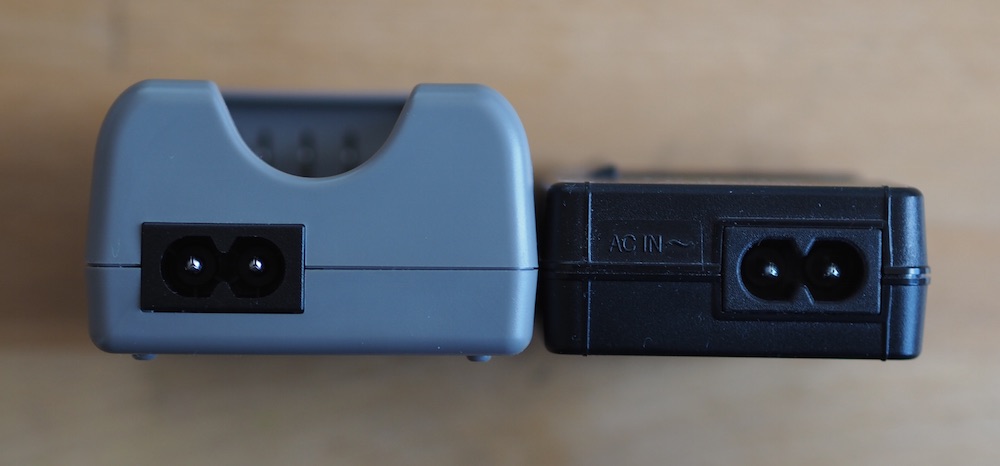
Instead, in order to charge the battery, you need to open the flap door on the bottom of the camera, take out the battery and put it in the supplied charger. That charger is rather big though, which is a very bad match considering the camera’s really small size. Below, you can compare the size to some Panasonic charger – the Olympus charger is about twice as big as the Panasonic one.
Additionally, inserting the battery into the camera is a bit cumbersome because the battery doesn’t have any kind of physical guide. It can be inserted in two ways, and 50% of the time you put it in the wrong way, just to notice that it won’t go into its locking position. On other cameras this is solved much better: The Nikon D40 e. g. simply has a physical shape to the battery which allows it to be inserted the correct way only.
Eye Sensor in Playback Mode
The OM-D E-M10 has an eye sensor which switches from the rear screen to the EVF (electronic viewfinder) as soon as you put the camera to your eye. It works really well, except for one thing: When viewing images, it often kicks you back into live view mode because you unintentionally activate the sensor with your hand.
This problem occurs because to view images on this camera you need to press the playback button on the back of the camera. After you press that playback button, which is very nicely located by your right thumb, you usually rotate your thumb down to the cursor and “OK” buttons, or to the touchpad, in order to flip through the image catalog. During this thumb motion it happens to me about 50% of the time that my thumb passes by the eye sensor, which has the effect of exiting playback mode and putting you in live view mode.
An easy solution would be that the playback mode should not be ended by activating the eye sensor. The playback mode should only be ended by half-pressing the shutter release button, as is common on other cameras as well (e. g. Nikon).
IBIS Settings Should Be Stored in Image Metadata
This camera has really good in body image stabilization (IBIS), which works no matter which lens you’re using.
Unfortunately, the currently used IBIS setting is not recorded in the image metadata. It would provide an interesting piece of information when reviewing images: Which images are blurry and which are not, and why?
Noise
This one is really strange. The OM-D E-M 10 makes quite some (acoustic) noise when it is turned on and is just doing nothing. You can hear it easily when you put the camera close to your ear. It can be easily heard even at a distance at room noise levels when you put the camera on a resonating surface, e. g. a wooden table.
This noise is not related to IBIS – it occurs even if IBIS is turned off completely.
It’s not related to autofocus either – the noise can also be heard when the camera is in playback mode or when it is set to manual focus only.
And lastly, the noise is not related to sensor cleaning – the cleaning happens only when turning the camera on.
Unfortunately, this noise is also recorded when shooting videos, even if you put the camera to manual focus and turn off image stabilization for movie recording.
Battery Charge Indicator
The battery charge indicator has some problems.
First of all, when the battery is full, it only appears briefly when you turn the camera on, and then disappears. This might have some logic to it, but we’re all used to electronic devices displaying the charge level all the time (all smart phones and laptops do it this way), so it’s just confusing if the battery indicator is sometimes hidden.
Also, the battery charge indicator is not very reliable. For example, it will display “full” when you turn the camera on, then after some minutes of shooting it will display “medium charge”. After turning the camera off and on, it will display “full” again. Then all of a sudden, it will display “almost empty” which leaves you with only a couple of shots (the battery warning levels can be fine tuned in the settings – it may be possible to improve this behavior there).
This is exacerbated by the fact that the battery really doesn’t last long. Compared to any DSLR it feels ridiculous how fast the battery runs low.
Deleting Images
Deleting Single Image
Deleting a single image is a bit uncomfortable because you need to press “delete” and then “OK” (separate button) to confirm the deletion. Nikon does it much nicer on its DSLRs – you press “delete” and then you confirm by pressing “delete” again, which is a lot quicker of course.
Deleting Several Images
The OM-D E-M10 has a nice “select and delete” feature to delete many images at once: You select any number of images using a separate “select” button. If you press “delete” now the camera asks you “Erase selected?” which allows you to delete all the images you selected.
The problem with this confirmation dialog is that it displays neither the number of images you selected nor thumbnails of the images you’re about to erase. Either would be much better!
Selecting Images for Sharing and Locking
In the playback mode, grid view, one can easily select several images either using the select button or the onscreen select checkbox, and then either “lock” or “share” all selected images at once using the onscreen “lock” and “share” icons.
The only problem is that “unlocking” or “unsharing” cannot be done with several images at once, instead, this has to be done per image. So if you unintentionally “locked” or “shared” a couple of dozen images at once, and want to “unlock” and “unshare” them, you need to go through all those images and separately press the unlock and unshare icons for each image individually.
It would be much easier if the unlocking and unsharing process worked the same as locking and sharing: Simply select as many images as you like, and press the lock or share toggle buttons to toggle those settings for all selected images.
Menu Should Remember Its Last Position Exactly
Pressing the button “Menu” on the camera displays the enormous configuration options of the OM-D E-M10. The problem here is that it doesn’t accurately remember your last position in the menu, but instead puts you at a somewhat higher level in the navigation structure.
So if you want to play around with some setting and go into the menu, change the setting, then go back into playback or shooting mode to check the effect of this setting, and then again enter the menu to change the same setting, most of the time you will have to navigate to the same setting over and over again.
Much better e. g. on the Nikon D40, which simply reliably puts you in the last used position in the menu structure, which makes it much more comfortable to try out different settings for a configuration option.
Aperture Preview Mode Should Be Indicated
The OM-D E-M10 has an aperture preview mode, which can be easily mapped to the FN1 or FN2 button. When pressing that button, the aperture is stopped down to the currently chosen F-stop, and the live view can be used to check the resulting depth of field.
Unfortunately, there is no indication at all that this is happening, other than a really gentle sound caused by the aperture blades. So if you forgot that you assigned aperture preview to that button, you might be confused because nothing seems to be happening (if your aperture is set to the largest f-stop of your lens, the image doesn’t change at all).
It would be nice if the camera displayed a small icon on the monitor when this is done, to indicate that the aperture preview mode is active.
Menu Button Should Be Called “Menu & Back”
The menu button, which is named “MENU”, really servers several functions. Most prominently, when navigating the menu structure, it is also used as a “back” button, allowing you to navigate up in the menu hierarchy.
In these cases, the display always contains the remark “Back: MENU” to indicate the double function of this button. Instead, it would be more intuitive if the button simply contained a small “back” icon (e. g. return arrow) below the “MENU” inscription.
Strap Fastening
Fastening the strap on the OM-D E-M10 seems strangely complicated, at least if you stick to the manual. Here’s how you’re supposed to do it:

Admittedly, fastening the strap is just as complicated on many other cameras. But this should not keep Olympus from designing and offering a simpler way (which, in addition, should make the strap length easily adaptable).
Maybe the noise at startup is related to the dust reduction function?
From the manual (p136): “This camera incorporates a dust reduction function to keep dust from getting on the image pickup device and to remove any dust or dirt from the image pickup device surface with ultrasonic vibrations. The dust reduction function operates when the camera is turned on. The dust reduction function operates at the same time as the pixel mapping, which checks the image pickup device and image processing circuitry. Since dust reduction is activated every time the camera’s power is turned on, the camera should be held upright for the dust reduction function to be effective.”
No, the noise I’m describing can be heard all the time, not only when the camera is turned on.
Excellent post – clearly by someone who has been using the E-M10 extensively! I have almost ran into all of the issues you’ve mentioned above and keep hoping for a firmware update that might change the software behavior for lot of the points you’ve listed. Most of the issues are all fixable (via software). But I doubt Olympus is going to address these for older camera models.
Thanks – but no, I didn’t have to use the camera for very long to notice most of these shortcomings. Which makes it even harder to understand why Olympus didn’t notice (and fix) them!
Excellent post! I wish someone at Olympus reads this and decides to provide a firmware update. But going by the general way things seem to work in the Camera Manufacturing business, I doubt they would do so. Firmware updates seem to be reserved for updating critical flaws in the working of the camera, as opposed to just improving the functionality. Need to check the new MarkII to see if they have addressed any of these needs. Thanks for posting this though. Does confirm that same challenges I and others are facing while using this otherwise awesome camera.